How to Install and Configure Oxide Plugins on Your Rust Server
Install Oxide on your MANAfuel Rust server and add uMod plugins in under 5 minutes using the dashboard mod installer.
Deploy a Rust Server with Oxide
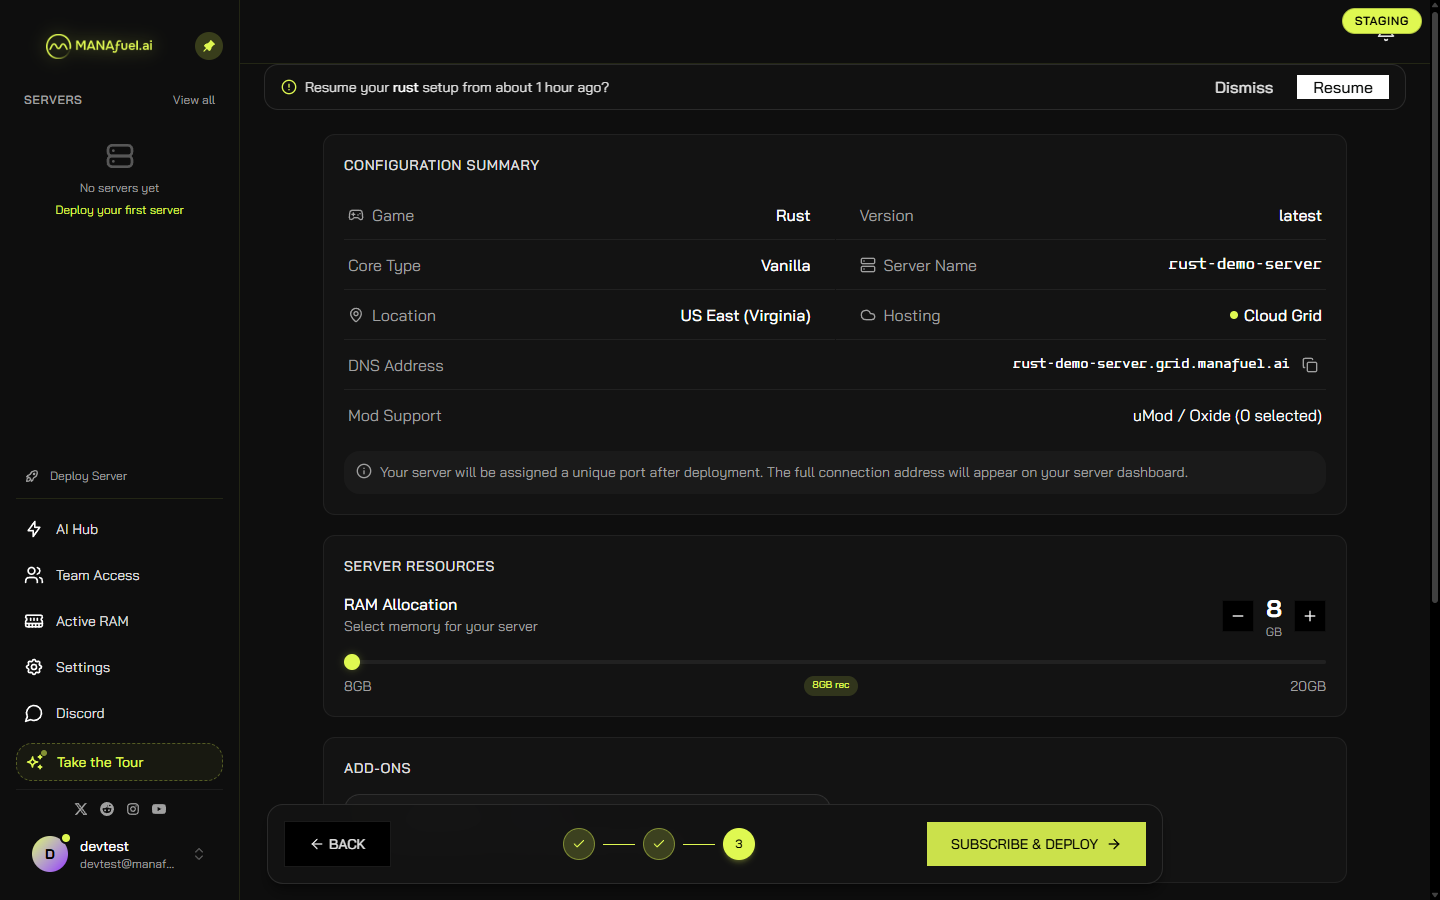
Open the MANAfuel dashboard and click Deploy Server in the sidebar. The deployment wizard opens with a grid of every supported game. Click the Rust tile — it highlights with a green border and a checkmark. The bottom panel shows Rust with version options: Latest Stable or Beta Branch. Leave it on Latest Stable and click NEXT. On the next screen, enter a server name (letters, numbers, and hyphens only), pick a region from the world map, and click NEXT again. The review page shows your Configuration Summary: Game, Version, Core Type, Server Name, Location, DNS address, and Mod Support (uMod / Oxide). Adjust RAM with the slider — 8 GB is the minimum for Rust, 8 GB recommended. Click SUBSCRIBE & DEPLOY.
MANAfuel deploy review page showing Rust server configuration: version latest, US East Virginia, 8GB RAM, uMod/Oxide mod support, and Subscribe & Deploy buttonOpen the Mods Tab
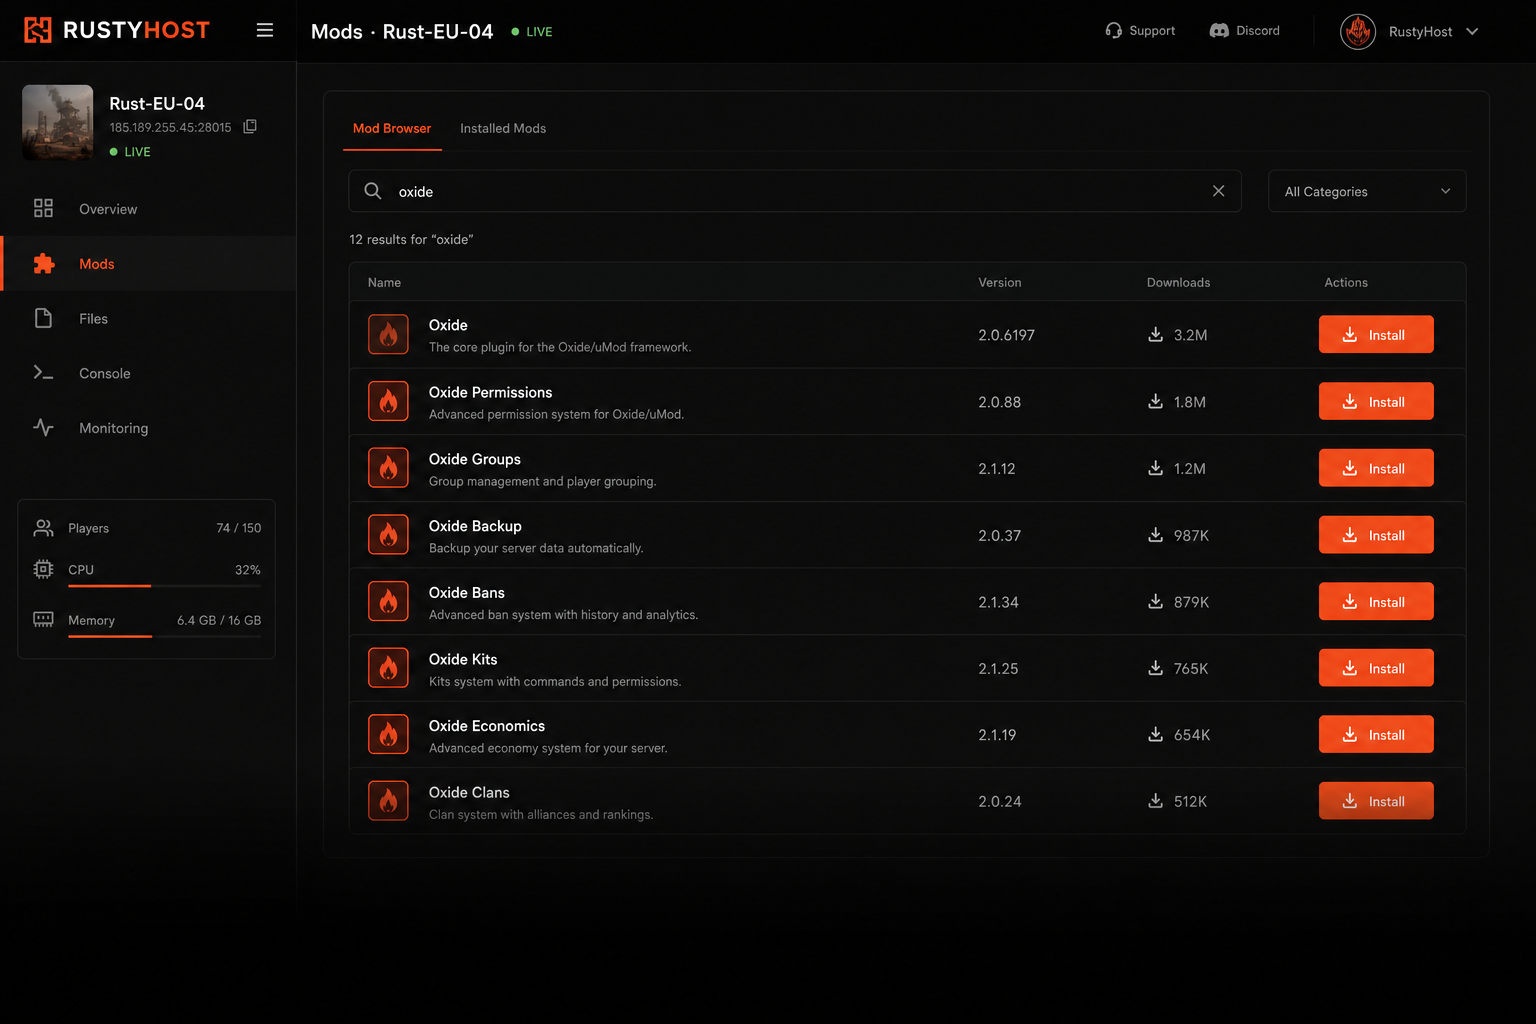
Once your server finishes deploying, it appears in the sidebar under SERVERS. Click it to open the server panel. Select the Mods tab from the tab bar. The Mods tab has three sub-tabs: Browse, Installed, and Activity. Browse connects to the uMod plugin library and lets you search over 3,000 Rust plugins by name or category. Installed shows every plugin currently on your server with its version and load status. Activity is the install and update history with timestamps.
Search and Install a Plugin
In the Mods tab, make sure you are on the Browse sub-tab. Type a plugin name in the search bar — try Gather Manager for a popular first install. Each result shows the plugin name, author, download count, version, and an Install button. Click Install. MANAfuel takes a pre-flight backup of your server data, downloads the plugin to the oxide/plugins/ directory, and verifies it loads without errors. The plugin appears in the Installed sub-tab with a green status indicator when loaded successfully. If a plugin requires a dependency, the installer flags it and offers to install both.
Configure Plugin Settings
Most Oxide plugins generate a JSON config file in oxide/config/ on first load. Open the Files tab in the server panel. Navigate the file tree on the left to oxide, then config. Click the plugin config file — for example, GatherManager.json. The file opens in the inline editor on the right side. Edit any value directly: resource multipliers, stack sizes, drop rates. Click Save. The change writes to the server immediately. For the change to take effect, some plugins hot-reload automatically; others need a server restart. The Mods tab tells you which behavior applies.
Set Plugin Permissions
Oxide uses a group-based permission system. Open the Console tab in the server panel — Rust servers get a full RCON Console with a command input bar at the bottom and a scrolling output area above. Type oxide.grant group default pluginname.permission to grant a permission to all players. Type oxide.grant user SteamID pluginname.permission for individual players. Create admin groups with oxide.group add groupname, then assign permissions to that group. View all available permissions with oxide.show perms. Every command executes immediately and the result appears in the console output.
Verify Plugins Are Running
In the RCON Console, type oxide.plugins. The output lists every loaded plugin with its version and status. Green means loaded and running. If a plugin failed to load, the error and stack trace appear in the server log — open the Logs tab to search for it. Check the Monitoring tab for server health: CPU usage, RAM usage, and player count charts. If a plugin is consuming excessive resources, the Monitoring tab shows the spike. To disable a problem plugin without removing it, go to Mods > Installed, find the plugin, and click Disable. Restart the server to confirm the issue resolves.